A guide to the ‘followICM’ technique

Building on standard ICM principles, this technique was developed on the streets of New York City. Intrigued by motion of the human form my goal was to explore the relationship between a moving public and their environment. This exploration was to become the core of my ‘Streetwalker’ series, which essentially chronicles the evolution of the process.

Concept

The technique I'm calling 'followICM' expands upon standard ICM (Intentional Camera Movement) principles aimed at creating motion blur across an image.

The key distinction in this technique is the variable level of the blur that occurs between the core subject and secondary elements.

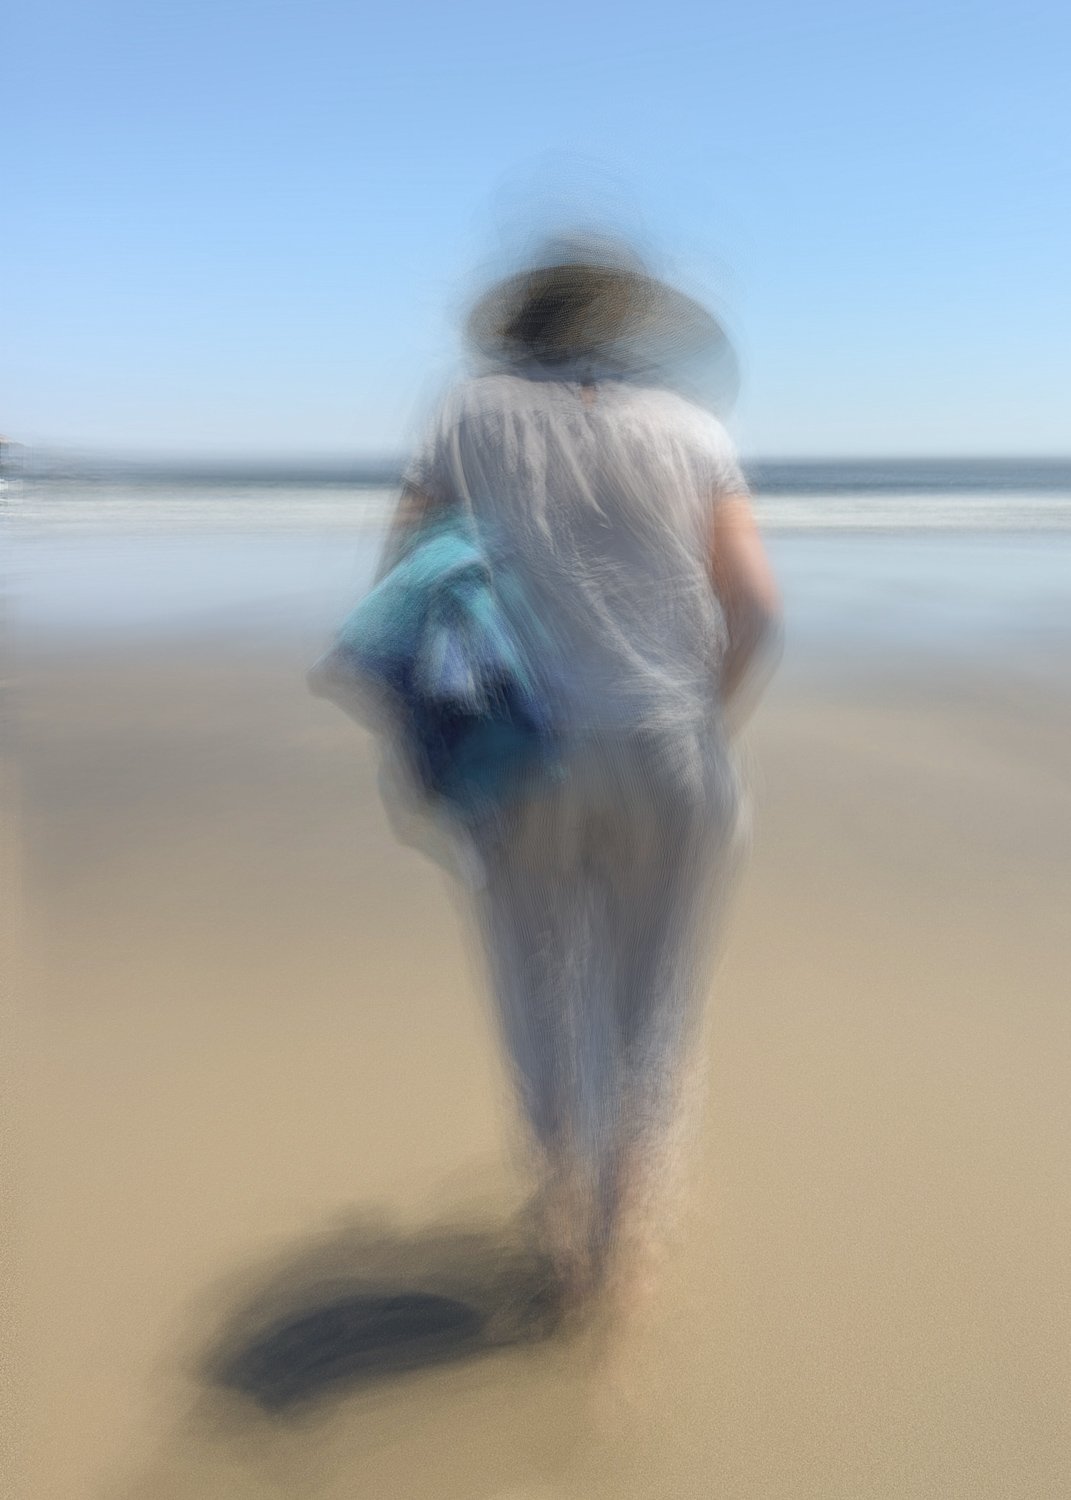
The concept is straightforward. By maintaining a consistent distance as the camera follows a moving subject, a certain amount of detail is preserved in the core of the subject relative to other elements within the frame.

The level of detail is primarily determined by exposure time and the speed of the subject's movement.

The example image illustrates a clear contrast in detail between the core of the subject, body movements, and secondary/mobile elements within the frame.

Equipment

My equipment of choice for this technique has become a simple iPhone, offering several advantages over dedicated cameras:

  • readily available

  • less conspicuous, making it a lot easier to go unnoticed.

  • availability of slow shutter applications, providing;

    • the ability to view the image as it builds during exposure

    • the ability to stop the exposure once desired results are achieved

    • integration with the iOS LivePhoto feature (more on that later)

This makes the technique accessible to anyone with a long exposure app installed on a mobile phone.

Capture process

The basic process involves initiating a long exposure capture while following behind a moving subject and stopping the exposure once the desired result (as viewed on the app) has been achieved. It's worth noting that more extended exposures may become helpful when integrating with the iOS LivePhoto feature (more on that later).

As with all photography, the common principles of light, contrast, and composition play a significant role in the outcome. However, unique to this technique is the need to maintain a relatively consistent distance between the camera and the subject to preserve some level of detail. It is also important for the direction of the subject to be consistent; any veering off course will produce adverse effects.

Processing

This technique has zero significant processing requirements. Once images have been captured they can be processed in-camera and/or passed onto other editing platforms as desired. Where LivePhoto is being employed I suggest viewing the reel and selecting the optimal image (see below).

Following are examples of early images I captured using this very procedure. It can be seen that contrast and exposure length work toward highlighting and preserving a level of detail in the subject, with other elements more largely affected by the relative motion.

LivePhoto

Live Photo is a native feature of iPhone iOS, capturing images as a 3-second reel. Certain long exposure applications have the ability to integrate with this feature, providing a significant advantage in image selection.

While it may seem logical to think that mobile apps capture long exposure images in a similar fashion to dedicated cameras this is simply not the case. Instead they capture a stream of exposures and use an algorithm to average out results.

When integrated with LivePhoto, this stream of images is stored, each frame building upon the cumulative result of those captured previously. In this respect the result is a recording of the image as it was built over time. LivePhoto provides edit access to the stream through the native Photos app, allowing the ability to select any frame/moment in time as the exposure builds. The ability to replay the exposure and select an optimal frame is huge, as it allows for longer exposures during capture time with the knowledge that a selection can be made at a later time.

The images below show LivePhoto editing in action (assuming image was captured with LivePhoto option enabled).

  • The first is the original image as captured, seen as entering the ‘Edit’ function.

  • Image 2 shows the LivePhoto edit option, with the exposure ‘rolled back’ to the start/1st shot of the exposure.

  • Image 3 shows a selection in time within the exposure, and the ability to select that as the Key Photo. Note that changes are non-destructive and can be changed at any point in future.

Variations of the theme

With the basic principles understood and successes gained following a single subject it is now time to consider how the technique might be expanded. The possibilities are endless, but following are some suggestions from my own experiences.

Experiment with exposure time.

The amount of abstraction applied to the image is directly related to exposure length. Try shorter exposures to preserve an amount of detail, longer to give a greater impressionistic feel.

In these examples, the first image was captured with a shutter speed of 1.1 seconds, the second at 5.0 seconds.

Notice that with the increased exposure time comes a reduction in both detail and contrast, the latter of which may be compensated for in post processing as desired.

Use multiple subjects

Adding subjects to the scene can create further interest. It must be remembered when doing so that abstraction will vary depending on the relative movement between camera, primary subject and any secondary subject(s) introduced.

In these examples the effect on both subjects is identical due to a similar relative motion to the camera.

In scenes including multiple moving subjects the effect will vary accordingly. This is especially true for wider, or group settings, with elements moving at different speeds and direction.

In this case I find it best to identify and follow a single subject and take multiple exposures (varying time) if appropriate.

Seek out ‘trigger’ elements

Bold colors, hats, umbrellas, contrasting bags/backpacks etc that can all attract the eye add and extra element of interest.

Weather and time of day

Variations in weather and time of day provide unique opportunities that should be embraced.

Sunny summer weather brings out summer hats and sleeker clothing, with harsh shadows that can be used to advantage.

Wet weather on the other hand can equate to a sea of bright umbrellas, raincoats and wonderful reflections of light on soaked street surfaces.

Taking images at night can be challenging, but identifying and making use of available light sources can produce striking results. They key is to recognize the moment when subjects are isolated from the background, whether that be light from the front or silhouetted by light behind

Variations in weather and time of day provide unique opportunities that should be embraced. Sunny weather brings out summer hats and sleeker clothing, wet weather iconic umbrellas, raincoats and reflections from street surfaces. Be aware of what each weather situation may have to offer and work to take full advantage.

Widen the viewpoint

Opening up the scene beyond the primary subjects can create and interesting perspective and tell a broader story. Look for areas of contrast that will once again help isolate the subject from their surroundings.

Push the boundaries

Walk toward, rather than follow.

This has a completely different effect to that when following as the camera-subject distance is now amplified by subjects moving in the opposite direction.

As might be expected, this method has highly-variable results but nonetheless can be rewarding.

Lead the subject.

Walking ahead allows the capture of subjects from the front, therefore facing the camera.

This requires that the photographer either walks backwards to maintain distance (difficult unless staged), or in these examples shooting over the shoulder in ‘selfie mode’.

In either case it is difficult to frame the subject whilst at the same time remain inconspicuous.

Although results can be challenging, this variation adds a further layer of potential that might be explored.

Shoot on the wild side.

There is no right or wrong way to use this technique. Experiment with long exposures and no fixed subject to create a totally abstract or scene with detail stripped away.

In reality the only limitation on this technique is the imagination. Let your vision guide your shooting, learn from failures and above all else have fun doing so!

While this technique was initially developed with the camera tracking a moving subject, it is open to far broader exploration. Here are some results as I searched the limitations of this method.