Summary of my ‘humanessence’ techniques
I've always been fascinated by how the human form can be represented in art, transforming a precise moment into a portrayal that captures the mere essence of the subject. This can be done in many ways, and in this guide, I aim to share the techniques I use in my 'humanessence' gallery. While you might not find 'humanessence' in a dictionary, I believe it perfectly captures the goal of the series: to distill the essence of the human experience.
My aim is to share my experiences with others, hoping to inspire them to explore and experiment on their own.
Techniques
Long exposure camera pan
Traditional camera panning is typically used to follow a fast moving subject with a goal of keeping the subject sharp whilst blurring all around it. I use a similar technique with a goal not to retain detail in the subject but rather to capture movement. I think this adds interest to the image and helps build a story.
With these types of images it is important to aim for a balance between motion and shutter speed - results can vary from an image having too much detail (looking like a case of camera shake) or resulting in a picture where the form is unrecognizable, and hence lacking interest. Gestures and other identifiable shapes help to add interest. As with all things ICM be prepared to take a large number of shots and hope the stars align to provide that ‘decisive moment’
This image was taken very early in the morning. Sunlight reflecting off sea and sand creates a wonderful background to silhouetted figures. Note the identifiable shapes, and the effect of movement on head and legs. The incoming tide line and seaweed on the shore provide context to the story as do the sandals in hand.
I felt a more vintage look appropriate to this image, mimicking the long exposures forced by the use of insensitive film in the early days of photography.
Exposure = 1/4 second pan
This is an example in color, taken with a 1/2 second exposure while subjects moved toward the camera.
Again an attempt was made to follow the subject during exposure, notice the effect the longer exposure and camera movement has on other elements within the frame
followICM
The technique I'm calling 'followICM' expands upon standard ICM (Intentional Camera Movement) principles aimed at creating motion blur across an image. A key distinction in this technique is the variable level of the blur that occurs between the core subject and secondary elements.
The concept is straightforward. By maintaining a consistent distance as the camera follows a moving subject, a different level of detail is preserved in the core of the subject relative to other elements within the frame.
An additional key ingredient to this is the device used to capture. The ability to monitor a capture throughout the exposure and suspend it once a desired result is achieved makes a mobile device far more suitable than more expensive counterparts. The less conspicuous nature of capturing images on a mobile device and selection of available long exposure applications offer further attractions for use.
The following images were captured whilst following a subject and using a 1-3 second exposure.
Many more examples of the technique can be found in my ‘Streetwalker’ gallery found here
This is a technique I have experimented with that builds upon the ‘in-the-round’ technique developed by Pep Ventosa. Whereas the original technique involved taking a series of shots around a static element (eg tree, lamppost), in this case I attempt taking a number of images, moving between each one and keeping a (hopefully) semi-static subject in same position in each frame. The greatest challenge in this case is to identify a suitable subject and capturing a series of frames before they move.
Once a series has been captured images are layered and aligned in Photoshop as in other Pep Ventosa ‘in the round’ style works.
Multi-exposure blends
This is the result of a series of images captured on a busy Boston street at night.
Note the relative sharpness of the main subject and the effect of camera movement on other elements. Due to lighting conditions the series of shots were taken at 1/30second at ISO 1600
Fortunately, the subject remained relatively static as I took a series of images circling behind him. Utilizing a model in such instances would certainly make shooting more predictable.
Once the series of images (10 -15) were captured they were layered, aligned and blended in Photoshop as per my standard Ventosa ‘in-the-round’ practices.
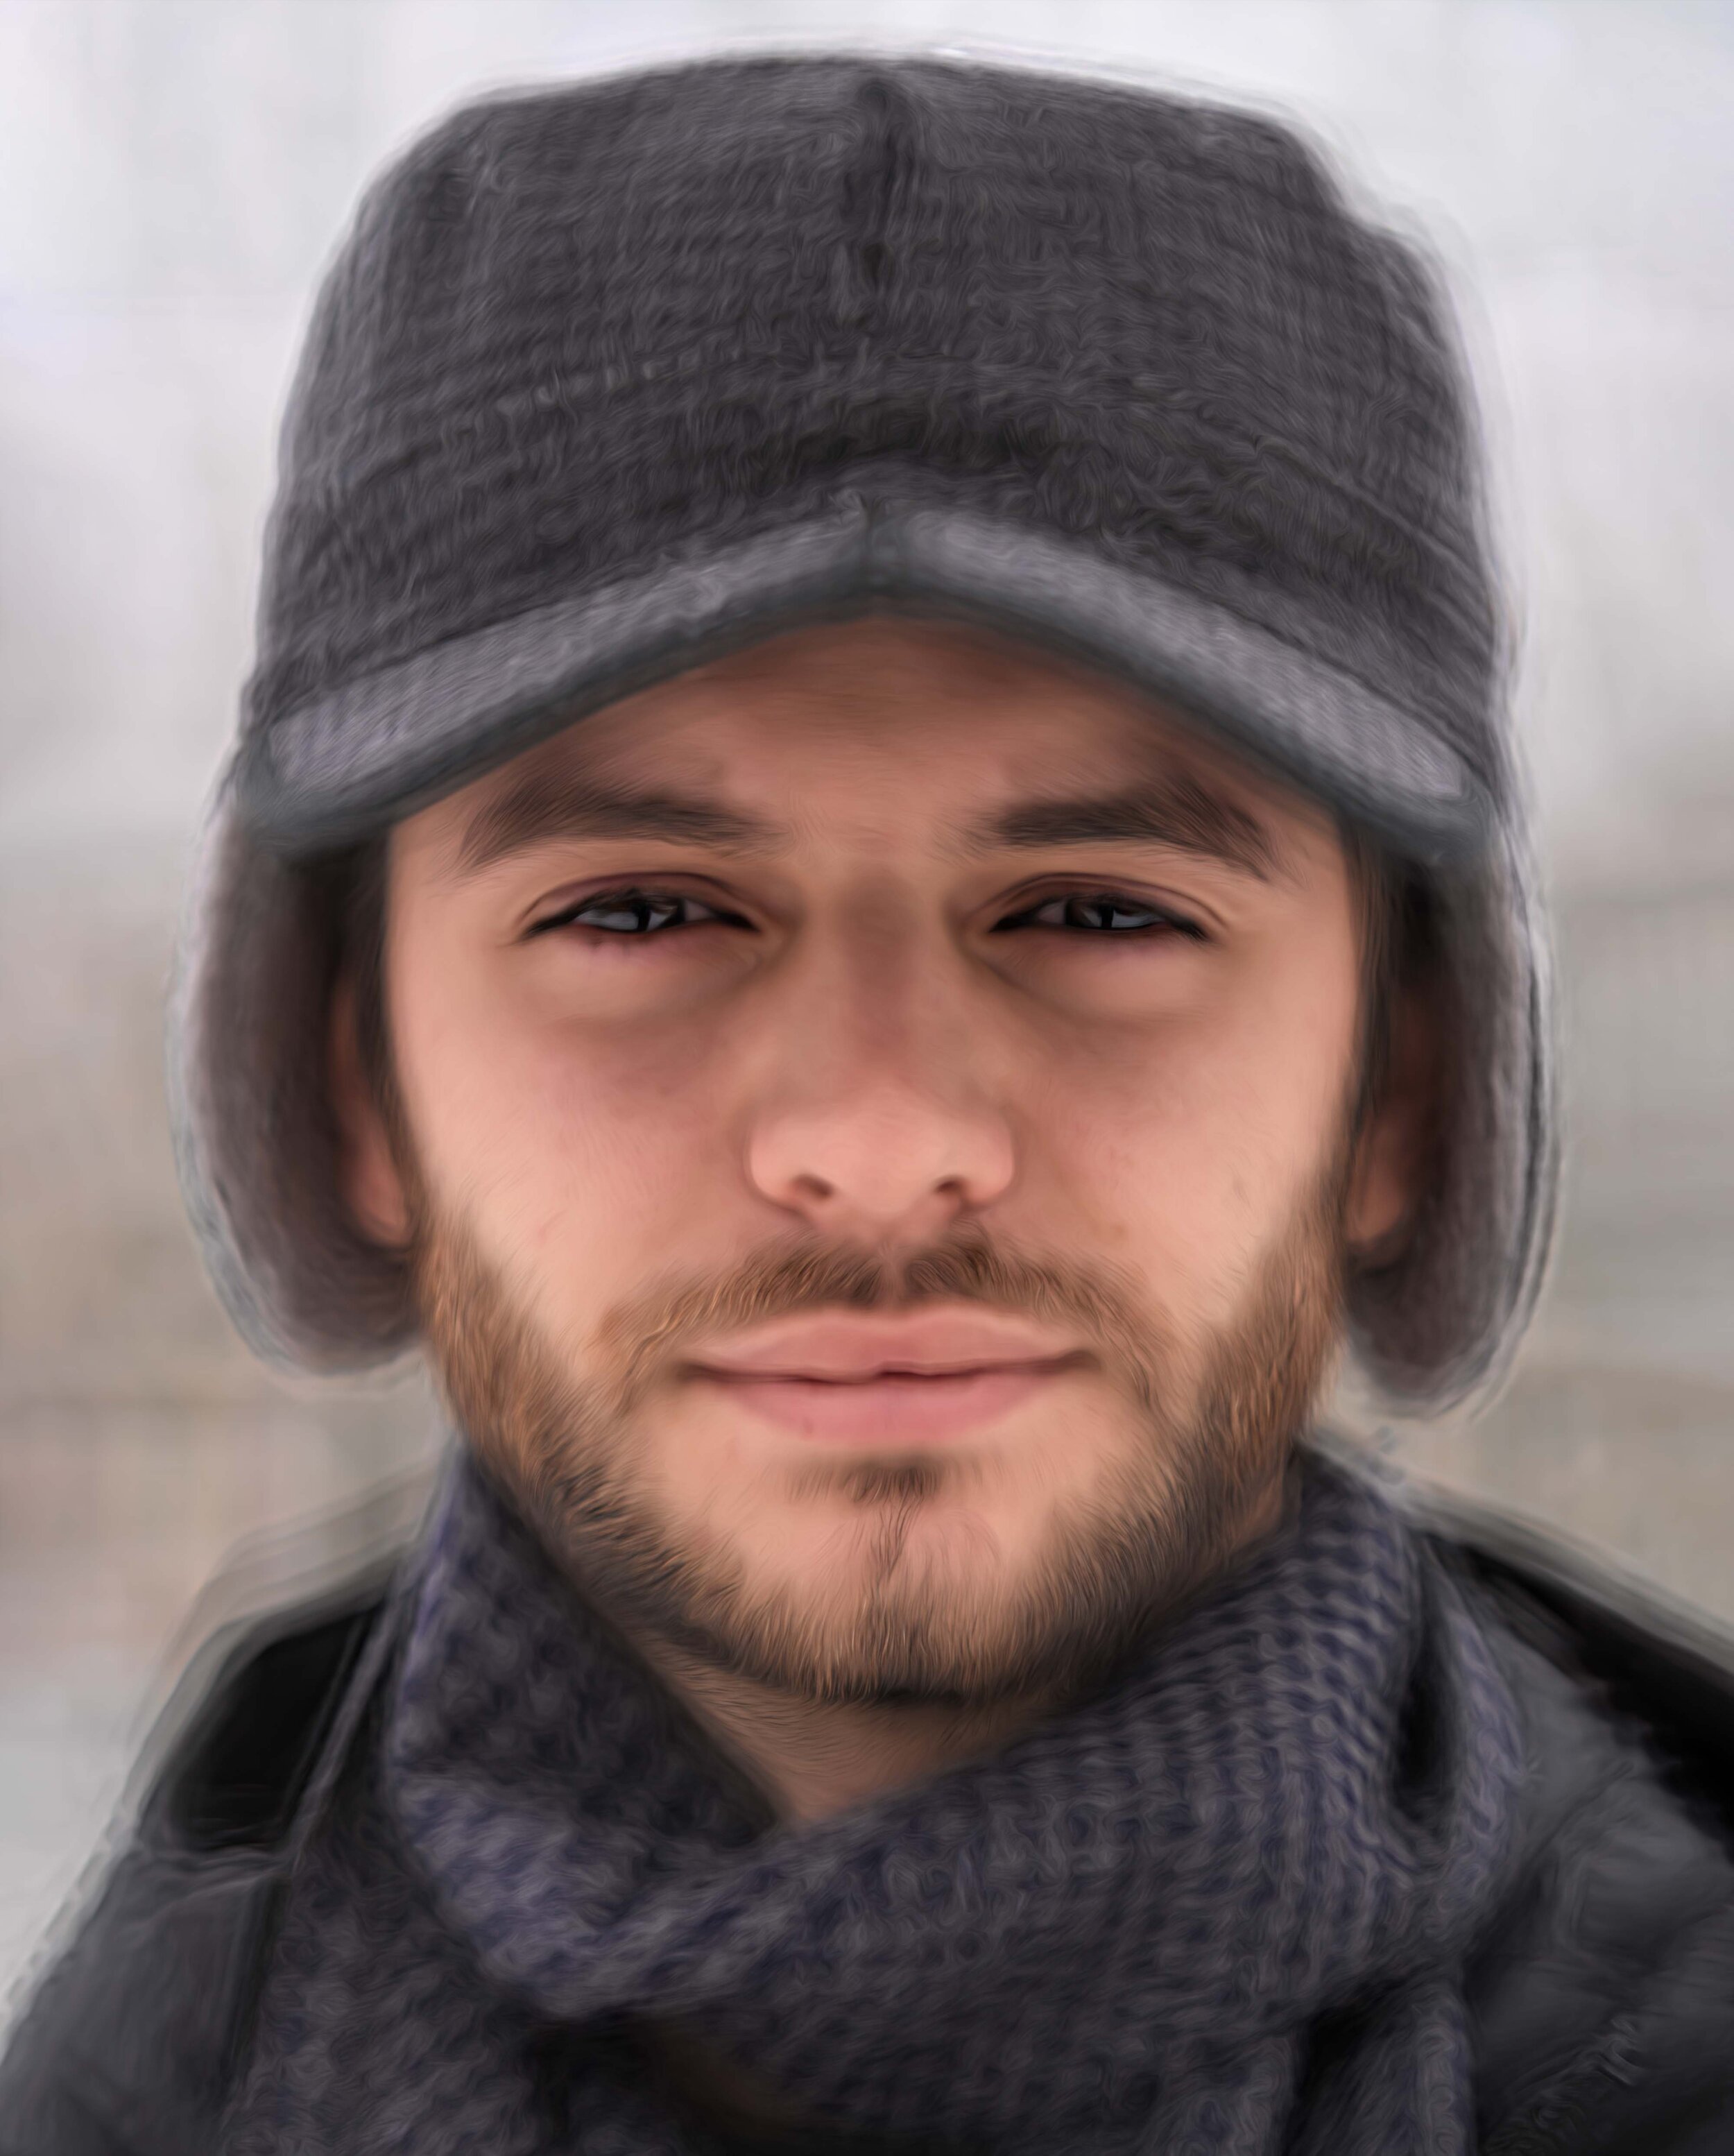
Orbital portrait
Orbital portrait is a phrase I coined as a need to describe the method used. This is a technique I developed that expands on the boundaries of the aforementioned ‘in-the-round’ style of shooting. In this case rather than taking a series of shots around a static element, both the photographer and the subject move in unison as the subject is circled. The end product is a series of images that when layered in Photoshop result in a relatively sharp subject with a background that is dissolved. This technique can be used on any object that is free to rotate and with space for the photographer to circle around.
In the following example I used my son as the model. I think in all around 20 shots were captured as both he and I circled in unison. Throughout the 360 degrees he attempted to maintain a static expression, whereas I attempted to keep him in the same position in each frame, paying extra special attention to the eyes. As you may expect with this type of work it is essential that the main facial features (eyes, nose mouth) line up somewhat throughout the images. To help correct alignment issues masks were created to allow slightly sharper eyes and dominant features.
As can be seen the background becomes dissolved, and elements not completely aligned provide subtle offsets. This is fun and rewarding to try with very little requirements. I strongly recommend that others give it a go, perhaps expanding to different subjects. Further examples can be seen in my humanessence gallery.
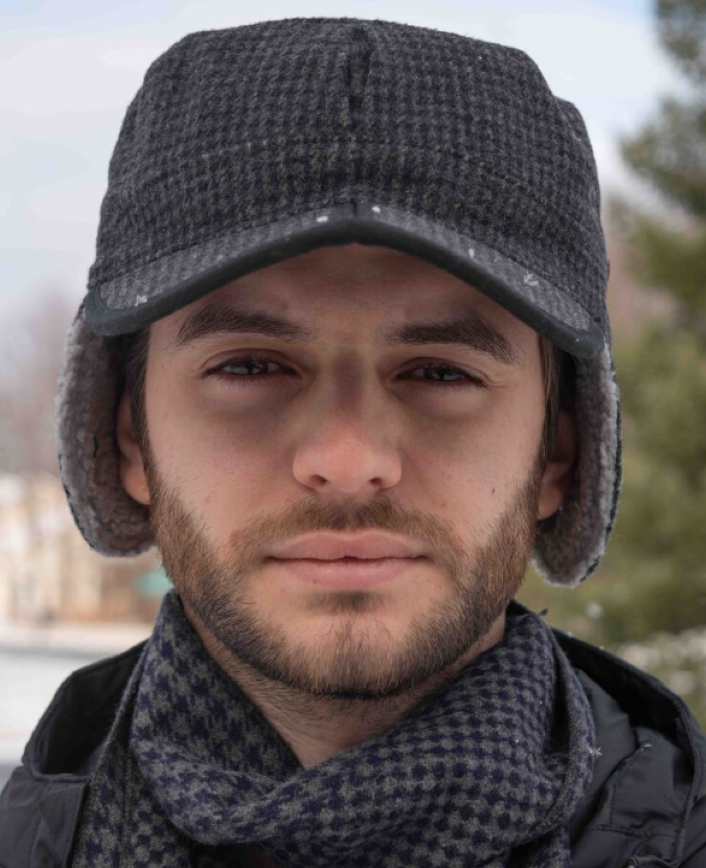
A sample from the original series
image stack aligned and blended
final product